Brownie Celebration Sodas!
I am having WAY too much fun this week! Tune in all week long as I get to do one of my absolute favorite things : Play with my food!
Wilton has come out with a new book which, I swear, they wrote just for me. Brownie Fun! is the name and playing with brownies is the game!
Lets face it, who doesn’t love brownies? So all this week I’m going to be bringing you Wilton’s AMAZING brownie recipes and CUTE CUTE CUTE Brownie decorating and serving ideas that anyone can do!
Today we have these adorable little celebration soda brownies and my next post will feature peanut butter brownies with peanut butter fudge icing!
I’ll also be showing you the latest in Wilton’s line of brownie tools to make creating and serving your brownies easier and more fun than ever! Ready for brownies? HERE WE GO!
This will be our text book all week long as we use the awesome new tools Wilton has come out with and cute and clever decorating ideas that anyone can do! Trust me, I’m gonna show ya…
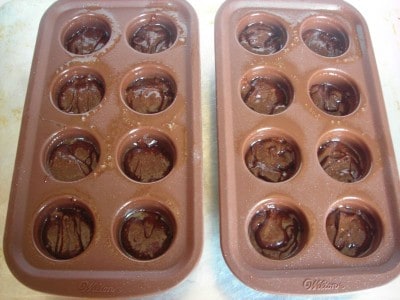
Today we’re going to be making these little Celebration Soda brownies using the new silicone Brownie Pop Mold from Wilton’s new brownie line. I have to tell ya, I had never baked in a silicone pan until this past weekend. Seriously. I guess I’m just kind of old fashioned that way.
I am happy to report though that it was pretty darn neat and awfully easy! I can’t fathom these brownie pops coming out of a regular pan this easily!
For this tutorial, I simply used a boxed brownie mix. Now I am used to making fudgy brownies but I found that cake like brownies work much better for brownie pops.
My family did not mind one little bit disposing of the fudgy ones for me though. 🙂 They’re such troopers.
Honestly, we have baked and consumed more brownies this weekend than most families do in a year.
I baked mine for about twenty five minutes to get them good and done. I normally partially under bake my brownies to make them even fudgier but as I said, you wanna get these good and done so they will be nice and sturdy for decorating later.
Let these cool completely in the pan before turning out.
While your brownies are baking, take some Wilton Candy Melts or chocolate almond bark and melt it in the microwave. I usually put mine in a bowl and heat it for thirty seconds at a time, stirring after each time, until it is melted and smooth.
When melting chocolate or candy coating, make sure everything that touches it is completely dry. If even the tiniest bit of water gets into it your candy will clot up and be pretty much unusable for any type of molding or coating purposes.
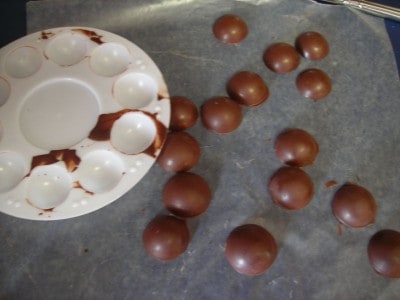
Place your candy in a plastic bag and cut the corner off of it. To make our bases for the Brownie Sodas we’re going to mold our candy in little plastic pallets. These are found in your craft or cake decorating department. Wilton makes a pallet but I don’t have a craft store where I’m at with a good selection of Wilton products so I got these little ones on the craft paint aisle.
Fill each cavity about 3/4 full.
Gently lift the pallet and tap it a few times on the table to get the candy to settle and be smooth and flat on top.
Sorry for the out of focus photo. Y’all know my good camera is being repaired and I have decided to do my best not to curse Nikon this week…well not too much at least. Alright, just enough to make me feel better. ~smiles~
Place your pallets in the freezer for just a few minutes until the candy hardens and then turn it upside down and tap it a bit for all of the candy bases to come out.
I never have enough work surfaces so I am forever placing down waxed paper to work with food on.
Using more chocolate in a sealed bag, place a dab on top of your base.
Place your brownie pop on top of the base and hold it there for a few seconds until the chocolate sets a bit.
I thought this would take a while but if you do this while your chocolate base is still cold from the freezer, it causes the chocolate to harden much quicker and it really only takes a few seconds until you can let go of your brownie pop and it is adhered very well. Out of over thirty of these, I only had two of them come undone and have to be “re-glued” with more chocolate. Of course, there was no shortage of volunteers to eat the ones that came undone…
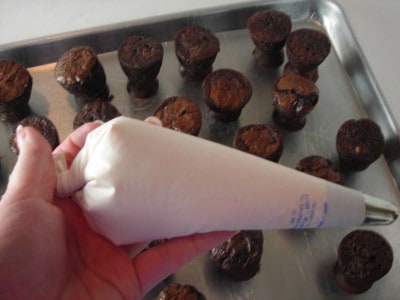
Now to put the icing on the top, I like to use these reusable pastry bags. When I am done using them, I just turn them inside out and place them on the top rack of my dishwasher to clean. If you don’t have an icing bag, you can make one out of parchment or just use a freezer grade zipper sealed bag with the corner cut off.
If you do use a zipper sealed bag, I suggest reinforcing the corner with tape before cutting it, that helps keep it from stretching when you are squeezing the icing out and making a huge mess.
I’m using a large rosette tip, Wilton recommends 2D for this. I have mild arthritis in my hands and due to that, only use tips with large openings unless I absolutely have to because you don’t have to squeeze as hard to get the icing out.
This is also a great tip to have if you want to pipe pretty deviled egg fillings and such.
This is one of my favorite icing tips. Doesn’t everyone have a favorite icing tip? ~grins~
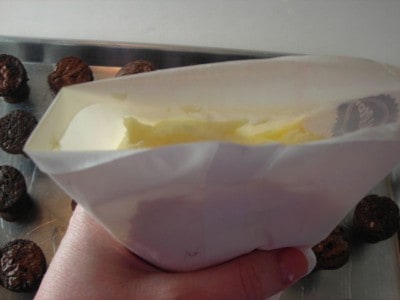
To fill your icing bag, insert the tip as shown in the previous picture and fold down the top.
Fill it with your icing.
(don’t worry, I’m going to give you this icing recipe at the bottom but you can also use store bought canned icing if you like!)
Pull the top back up. See, by folding it down, we now have a clean upper part of the bag that we can twist and close without squeezing icing out onto our hands.
You know any icing you squeeze onto your hand is icing you are contractually obligated to eat, right?
Some people fold the tops of their bags but I like to twist mine. The way I use my icing bag is easier for people who have problems with their hands or their grip (ie. arthritis).
Wow, I’m feeling old today..
I place the twisted part between my thumb and index finger and then use my entire hand to squeeze the bag.
Just do whatever is most comfortable for you.
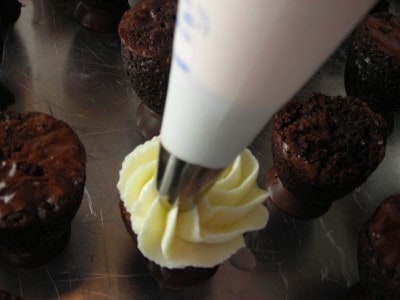
Applying even pressure, squeeze a circle around the top of your brownie pop.
Stop the circle in the center and squeeze until its as tall as you like it. The trick here is to STOP squeezing BEFORE you lift your tip.
If you’ve never done this before, its really easy. Just get your decorating tip and icing and practice on a piece of waxed paper. when you are done you can simply scoop the icing you practiced with back in your bag.
Remember, at the end of the day, it doesn’t have to be perfect. I think its important that we don’t get so obsessed with perfection that we take the fun out of decorating our food. I am making these as a surprise for my son’s third grade class. Do you think they are going to take time to study each one and see if my icing is perfectly applied or if I have excess chocolate on the bases? Of course not! Its the thought and the fun carrying out that thought that counts!
Hey, if you make brownies for someone and then go to the trouble to decorate them to boot, I promise they will be impressed with you regardless!
Put some sprinkles over the top before the icing sets up. The sprinkles will adhere really well for a few minutes and then the icing gets a very slight crust to it and they will roll off so stop after doing a few of these and use your sprinkles.
I used little red jelly beans for the tops of mine.
You can use all sorts of candies for this.
Now for the straws the book suggests dipping pretzels in chocolate and then piping a little spiral line on them to make it look like a cute little straw.
I loved that idea but….well there is always a lazier way!
Enter Starbursts. You can do pretty much anything with a starburst and a microwave.
This also goes for laffy taffy, tootsie rolls, and pretty much any chewy Starburst textured candy.
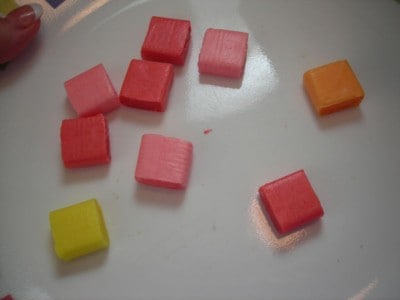
Unwrap your starbursts and put them in the microwave for about ten seconds, checking them after five by squeezing on one to see if it is pliable.
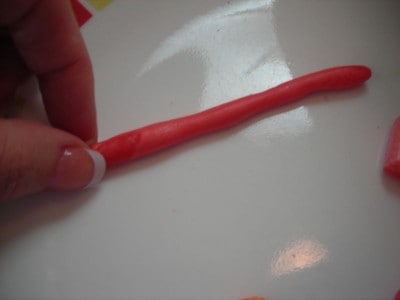
Make a worm. Don’t you just love getting to utilize your play-doh skills?
I need to show y’all how to do more with those skills. I’ll try to do that in upcoming posts. Its my little bit of justice towards my high school algebra teacher who swore up and down I’d actually use that again…
Algebra in adulthood – completely useless
Play-doh skills – oh yeah
If any kids are reading this, I am totally kidding. Algebra and Geometry have had an incredible effect on my life. So did that college statistics course. Seriously, made me a better person. Use them all the time. Couldn’t do without it … ~stifles a yawn as she looks for her play-doh~.
Cut each candy worm in half and let it cool to harden. After a minute or two I pick mine up and move them around on the plate so they don’t stick.
Now you have straws! I thought it would be cute to shape them like little spoons, too…
Stick one in each of your little brownie sodas.
You do know, don’t you, that I have never actually used the term “soda” in my life until this post….

The possibilities with the brownie pop mold are limitless!
The brownie book even shows how to make them into frogs and aliens!
[amd-zlrecipe-recipe:130]
Serve to delighted guests!
~~~~~~~~~~~~~~~~~~~~~~~~~~~~~~~~~~~~~~~~~~~~~~~~
I used a boxed mix for these little Brownie Sodas but here is an excellent Wilton recipe if you’d like to make them from scratch!
Wilton Cake Brownies
- 1 1/2 C Cake flour
- 3/4 tsp Baking Powder
- 1/4 tsp Salt
- 4 oz unsweetened chocolate, coarsely chopped
- 3/4 C unsalted butter or margarine, softened
- 3 eggs
- 2 tsp Wilton clear vanilla extract
Preheat oven to 350. Spray 8×2 inch or 9×2 inch square pan with vegetable spray.
In small bowl, combine flour baking powder and salt. In small microwave safe bowl, melt chocolate; let cool slightly. In large bowl, beat butter and sugar with electric mixer until light and fluffy. Add eggs, vanilla, and melted choclate, mix well. Stir in flour mixture by hand; mix until just well combined.
Spread batter into prepared pan.
Bake 30-35 minutes or until toothpick inserted in center comes out almost clean. Cool completely on rack before cutting.
Wilton Buttercream Icing
- 1/2 cup solid vegetable shortening
- 1/2 cup butter, softened
- 2 tsp Wilton clear vanilla extract
- 4 cups sifted confectioner’s sugar
- 2 T milk
In large bowl, cream shortening and butter with electic mixer until light and fluffy. Add vanilla. Gradually add sugar, one cup at a time, beating well on medium speed. Scrape sides and bottom of bowl often.
When all sugar has been mixed in, icing will appear dry. Add milk and beat at medium speed until light and fluffy.
Keep icing covered with a damp cloth until ready to use. For best results, keep icing bowl in refrigerator when not in use. Refrigerated in an airtight container, this icing can be stored for two weeks. Re-whip before using.
*Christy’s Note: I add additional water to mine to make the icing easier to squeeze through the pastry bag.













That is so neat…and looks very yummy!! How bout’ a couple of these at our next Starbucks outing??
WOW these look wonderful!
I am sooo excited about them.
thank you for sharing.
I agree with you. Southerners don’t use the word soda except to describe the stuff that comes in a box labeled “Arm & Hammer.”
BTW–I actually used geometry once. I was sewing a cover for my crock pot (lived in a house without enough cabinet space) and I needed to know the circumference of a circle. I actually used the pi-r-squared thing and it worked. Once in 35 years–does that make it useful?
Those will be a winner!! Too cute!
I’ve been wanting to buy the S shaped brownie pan (above post) but haven’t seen it locally. I guess I’ll have to order it by mail. Glad someone wrote a positive comment about it. My family loves brownies – chocolate, though…not those blondies. I love the chewy edge. I don’t have any little ones to make these special brownies for but for someone with little ones, I’m sure they would be a big hit! I use “Coke” to mean any carbonated drink. It’s funny how diffderent parts of the country call it something else…soda or pop.
Brownies are my favorite. I usually like the fudgier type as well, but I will try the cakey ones just because these are so darn cute.
Thanks
I just bought the brownie pan that looks like a snake which makes all the brownies have crunchy edges! It is the best! Everyone needs to try one! No silicone yet, maybe on my next gadget run.
Thanks for the great tips, Christy.
Oh yeah, down here in Savannah, we say “Coke” for any carbonated, fizzy brown liquid!